
If you have a sloped ceiling closet, you know that it can be pretty difficult. But, I was determined to make this closet as functional and clutter-free as possible, even with an angled ceiling.
Our Sloped Ceiling Closet

This thing was a mess. It was honestly so claustrophobic, and I just knew that it could be so much better. The closet is in our guest room + office combination that I’ve been working on for my husband. So, naturally, it’s his closet.
Want to check out my closet? Come see how I turned our unfinished attic into a massive walk-in closet. Fun fact, that also has a sloped ceiling!
For reference, this closet is about 4’6” x 5’4”
Let’s Get to Demoing!
The first step was to remove all the old shelving that was in place. I was quite shocked at just how easily everything came out. It took me all of five minutes to remove the old shelves, rods, and supports from the walls. Which of course had me questioning just how much longer they were going to last!

Then, I knew I wanted to remove the old carpet. I could tell that there was original hardwood underneath, but I wasn’t sure of the condition. I also didn’t have a plan B, so was just hoping for the best. Again, the carpet came up pretty quickly, and voila! The floors were in perfect condition! That feeling never gets old.

A Fresh Coat of Paint
The room also needed a fresh coat of paint. I had some leftover Valspar paint in the color Gravity, so I figured this was the perfect opportunity to use it up! It took two quick coats, and I was done!

For the baseboards, I used Valspar’s Simply White.
Making the Most of the Angled Ceiling
I didn’t have a plan for how to utilize the space before I started the demo. I knew that I needed to get everything out and start with a clean slate. The space instantly felt 3 times bigger, so I knew that I could make it feel open, even with everything going back in.
I decided that I only wanted a closet rod on the long side. When there were two, it didn’t feel like it took advantage of the space, because you couldn’t get to the back corner. Instead, I wanted one long rod where I could utilize the entire length.
I also realized that the closet rod could go a bit lower and further back than it originally was because I didn’t need to hang anything long like dresses. That also gave us quite a bit of additional space!
Plus, I could now place a long shelf over the rod and actually make use of some of the sloped ceiling area.
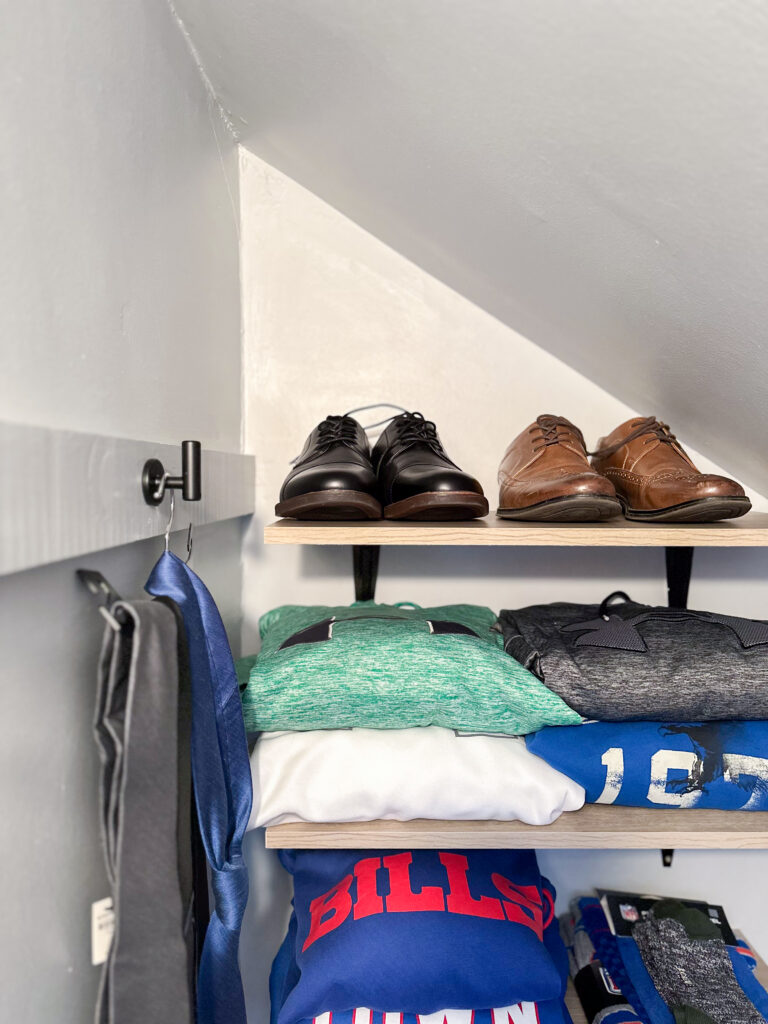
Now, I had to decide what to do with the back wall. Originally, I thought I would build some cubby storage. But I ultimately decided to just get some simple shelves from Home Depot and install them along the wall. They are the exact same shelves I installed in my closet, so I knew they were good quality, and looked good. This route was much simpler, and I think creates more visual space.
I also switched out his plastic hangers for these thinner ones. He’s not a fan of the velvet ones so I struggled to find decent-looking slim plastic ones, and these are perfect.


What do you think!?