Finally, she’s done! My main goal for this unfinished basement space was never to completely finish it, but to give it an upgrade so that it was much more usable, a lot less scary, and a whole lot cleaner! It was a lot of work and time, but I’m so happy with the results. Let’s take a look back at this project.
Basement Project Recap:
- My Plans for the Unfinished Basement
- Epoxying my Basement Floors
- Painting the Basement
- Building a Basement Shelving Unit
- Fixing my Scary Basement Stairs
- DIY Basement Stair Railing
- My DIY Lumber Cart
- Workshop Pegboard Upgrade
- Building a DIY Workbench
- Giving my Simple Workbench an Upgrade
- Revealing my Basement Workshop
- Giving my Basement Laundry Area an Easy Upgrade
Epoxy Floors
This was the very first thing that I did to the unfinished basement and it instantly made a huge impact. That red paint was such a nightmare and so difficult to keep clean. Now it’s brighter, cleaner, and much more durable.


Timeline
I had to do the floors in two sections because of storage issues, so it took me 16 days total.
Budget
Original budget: $750
Actual: $678.84
Painting the Unfinished Basement
This was another project that had an immediate impact! I patched the Drylok on my basement walls and gave them a fresh coat of white paint in the color Polar Bear by Behr. I also painted the posts in the same color and gave the beam a fresh coat of Rustoleum paint in Black. Then, I moved on to the closet area which got a nice coat of Tricorn Black by Sherwin Williams.


Timeline
This took me just over two weekends to complete. The longest was the walls which took me three days to do because the texture of the walls made painting much more difficult than I had intended!
Budget
Original budget: $100
Actual: $128.59
Building the Basement Storage Unit
Of all the things that bothered me about my basement, this one was probably #1. There was just a disorganized chaotic mess of crap in our basement and every time I would see it, I would get anxious. So, I built a 12-foot-long storage unit to finally store everything. I even finished it off by adding a curtain to the area so that it remains separate and protected from dust.


Timeline
I built this entire unit over three days, for a total of roughly 8 hours!
Budget
Original budget: $250
Actual: $301.18
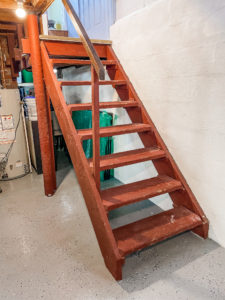
Updating my Unfinished Basement Stairs
This project definitely makes the cut for one of my favorites! I replaced the very ugly dirty treads, added risers, and built my own railing and newel post from scratch! The Tricorn Black color and additional trim on the post really give it such an elevated look and I love it!

Timeline
This was the longest project in the basement up until this point, taking me about a month to complete (working mostly on weekends).
Budget
Original budget: $150
Actual: $255.83
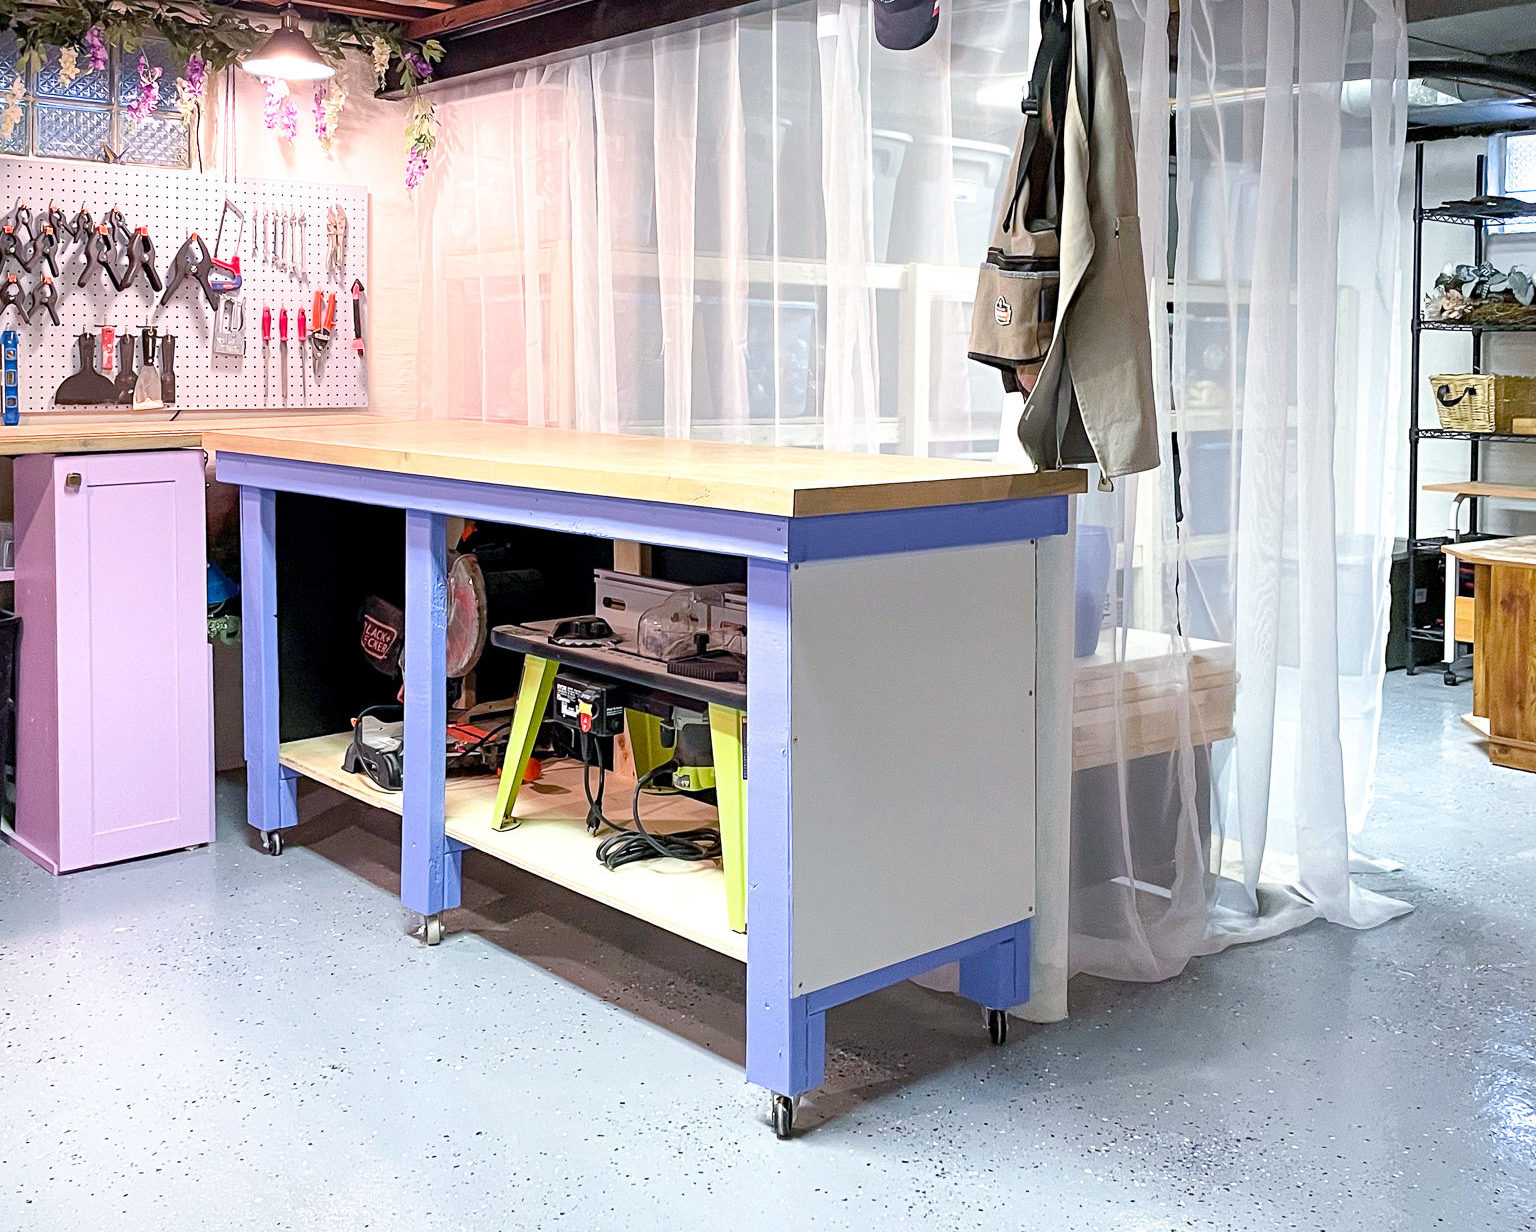
My Basement Workshop
A lot of work went into this workshop, not only to give me everything I needed but also to keep it economical. I opted to use mostly particleboard/melamine to keep costs down, which meant the build took a little bit longer. But, wow, I love this workshop! I had no idea that I would go with such a bright color scheme until I did it and I have no regrets.


Timeline
This was definitely the longest part of the entire project, taking me about 6 weeks total.
Budget
Original budget: $350
Actual: $757.36 (even with economical choices, I went a bit higher than anticipated!)
Upgrading the Basement Laundry and Utility Sink
Would I love to have a jaw-dropping Pinterest-worth laundry room? Obviously. Does it make sense in this unfinished basement and this home? Not at all. But, I still wanted to give this area a little upgrade to make it cleaner, more organized, and prettier. So, I did! I used leftover melamine to create a small shelf for my laundry area, added some organization, did some deep cleaning, and added a pretty sink skirt!


Timeline
I was actually just getting over COVID during this process, so it took a little longer than normal, but overall it was about 5 quick days of work!
Budget
Original budget: $150
Actual: $118.22
The Final Unfinished Basement Upgrade
Well, I definitely went over my planned timeline and budget, one more so than the other!


Timeline
Original timeline: 13 weeks
Actual timeline: 21 weeks
Honestly, past Brittany might’ve been annoyed by this, but I didn’t want to rush anything for this project. I’ve done that in the past, and always end up having to go back and make fixes in the future. I also didn’t want to burn myself out! And I can happily say that I only overextended myself on a couple of small occasions. For the most part, I listened to my body and my mind and I’m totally ok with this taking longer than I had originally planned.
Budget
Original budget: $1750
Actual: $2240
Realistically, I said I wanted to be somewhere between $1500-$2000, so I was only slightly over. The main area where I overextended myself was in the workshop, but I’m so happy with how it came out and I know that I made budget-friendly choices when possible, so I’m good with that too!
What’s Next?
Originally, my plan for 2022 was to tackle four rooms this year: my basement (check!), my kitchen, my living room, and my hallway/linen closet. I plan on moving right along to my kitchen next, and I think that will probably take me until the end of the year, if not pretty close. So, I’m already planning on moving my living room and hallway in the winter/spring of next year, and I’m totally ok with that!
My kitchen will be a pretty big project, and I’ll be sharing everything from building cabinets from scratch, installing flooring, upgrading countertops, and more!