Yep, you read that right. I’m building my own DIY kitchen cabinets! Or rather…I kind of already did!
So, here’s the thing. I actually already built these cabinets a little over a year ago. That was before Britt and Ivy Design existed, and I continuously kick myself for not documenting the process more. However, I have a pretty extensive note system from when I did this and I recall the entire process. So, rather than skipping over this, I’m still going to share it!
Why? Because whenever someone sees my cabinets I can see it in their face (or they tell me!) how shocked they are that I built them. It seems really intimidating. But guess what, it’s actually not! Is it difficult? Yes. Does it take a lot of planning? Oh yes. But if I can do this, so can you!
I started Britt and Ivy Design to encourage women that they can do hard things, like build DIY custom kitchen cabinets! So, I’m here to show you how I did that!
Goals for the New Cabinets

(the before)
I had three main goals for these new cabinets. First, our home always needs more storage. It’s pretty small and storage is definitely lacking. I am the type of person who hates having stuff out and visible. I’d prefer everything to be tucked away and my countertops to be clear. So, having plenty of storage was top of my list.
Second, we’d been using these small standalone cabinets for a couple of years. They were great, except for the fact that there were a lot of opportunities for dust to build up. Not only did the open shelf create trouble, but there was always a ton of dust (and mostly cat hair) that would build up underneath. I wanted to eliminate this problem.
And finally, I wanted cabinets to look like they were always meant to be there. Having these temporary solutions just looked like afterthoughts in my mind, and it just wasn’t working! So, I wanted some built-in cabinets that looked like they were always there!
Why I DIY’d
If you don’t want to build your cabinets from scratch, there are plenty of options out there. Lowes and Home Depot sell unfinished cabinets that you can customize. You can also go the Ikea route if you wanted! However, our needs were very unique on this wall.

First, we have a door that goes to our backyard, so the depth of the first cabinet could only be up to 16”. Second, I wanted to make sure the fridge was in the right space on this wall. It had to be far enough over to not cause issues with the back door, but also close enough so that it wasn’t too far from the oven and sink. We can’t make a perfect triangle in our kitchen, no matter how hard we tried because of the layout, but I wanted it to be pretty dang close.
So, between the depth and width requirements we had, I wasn’t going to find anything pre-built to meet those needs. And having something custom built for us was way over budget. Plus, I really wanted to give it a try, so why not!? So how did I design my DIY kitchen cabinets?
The Design & Plans
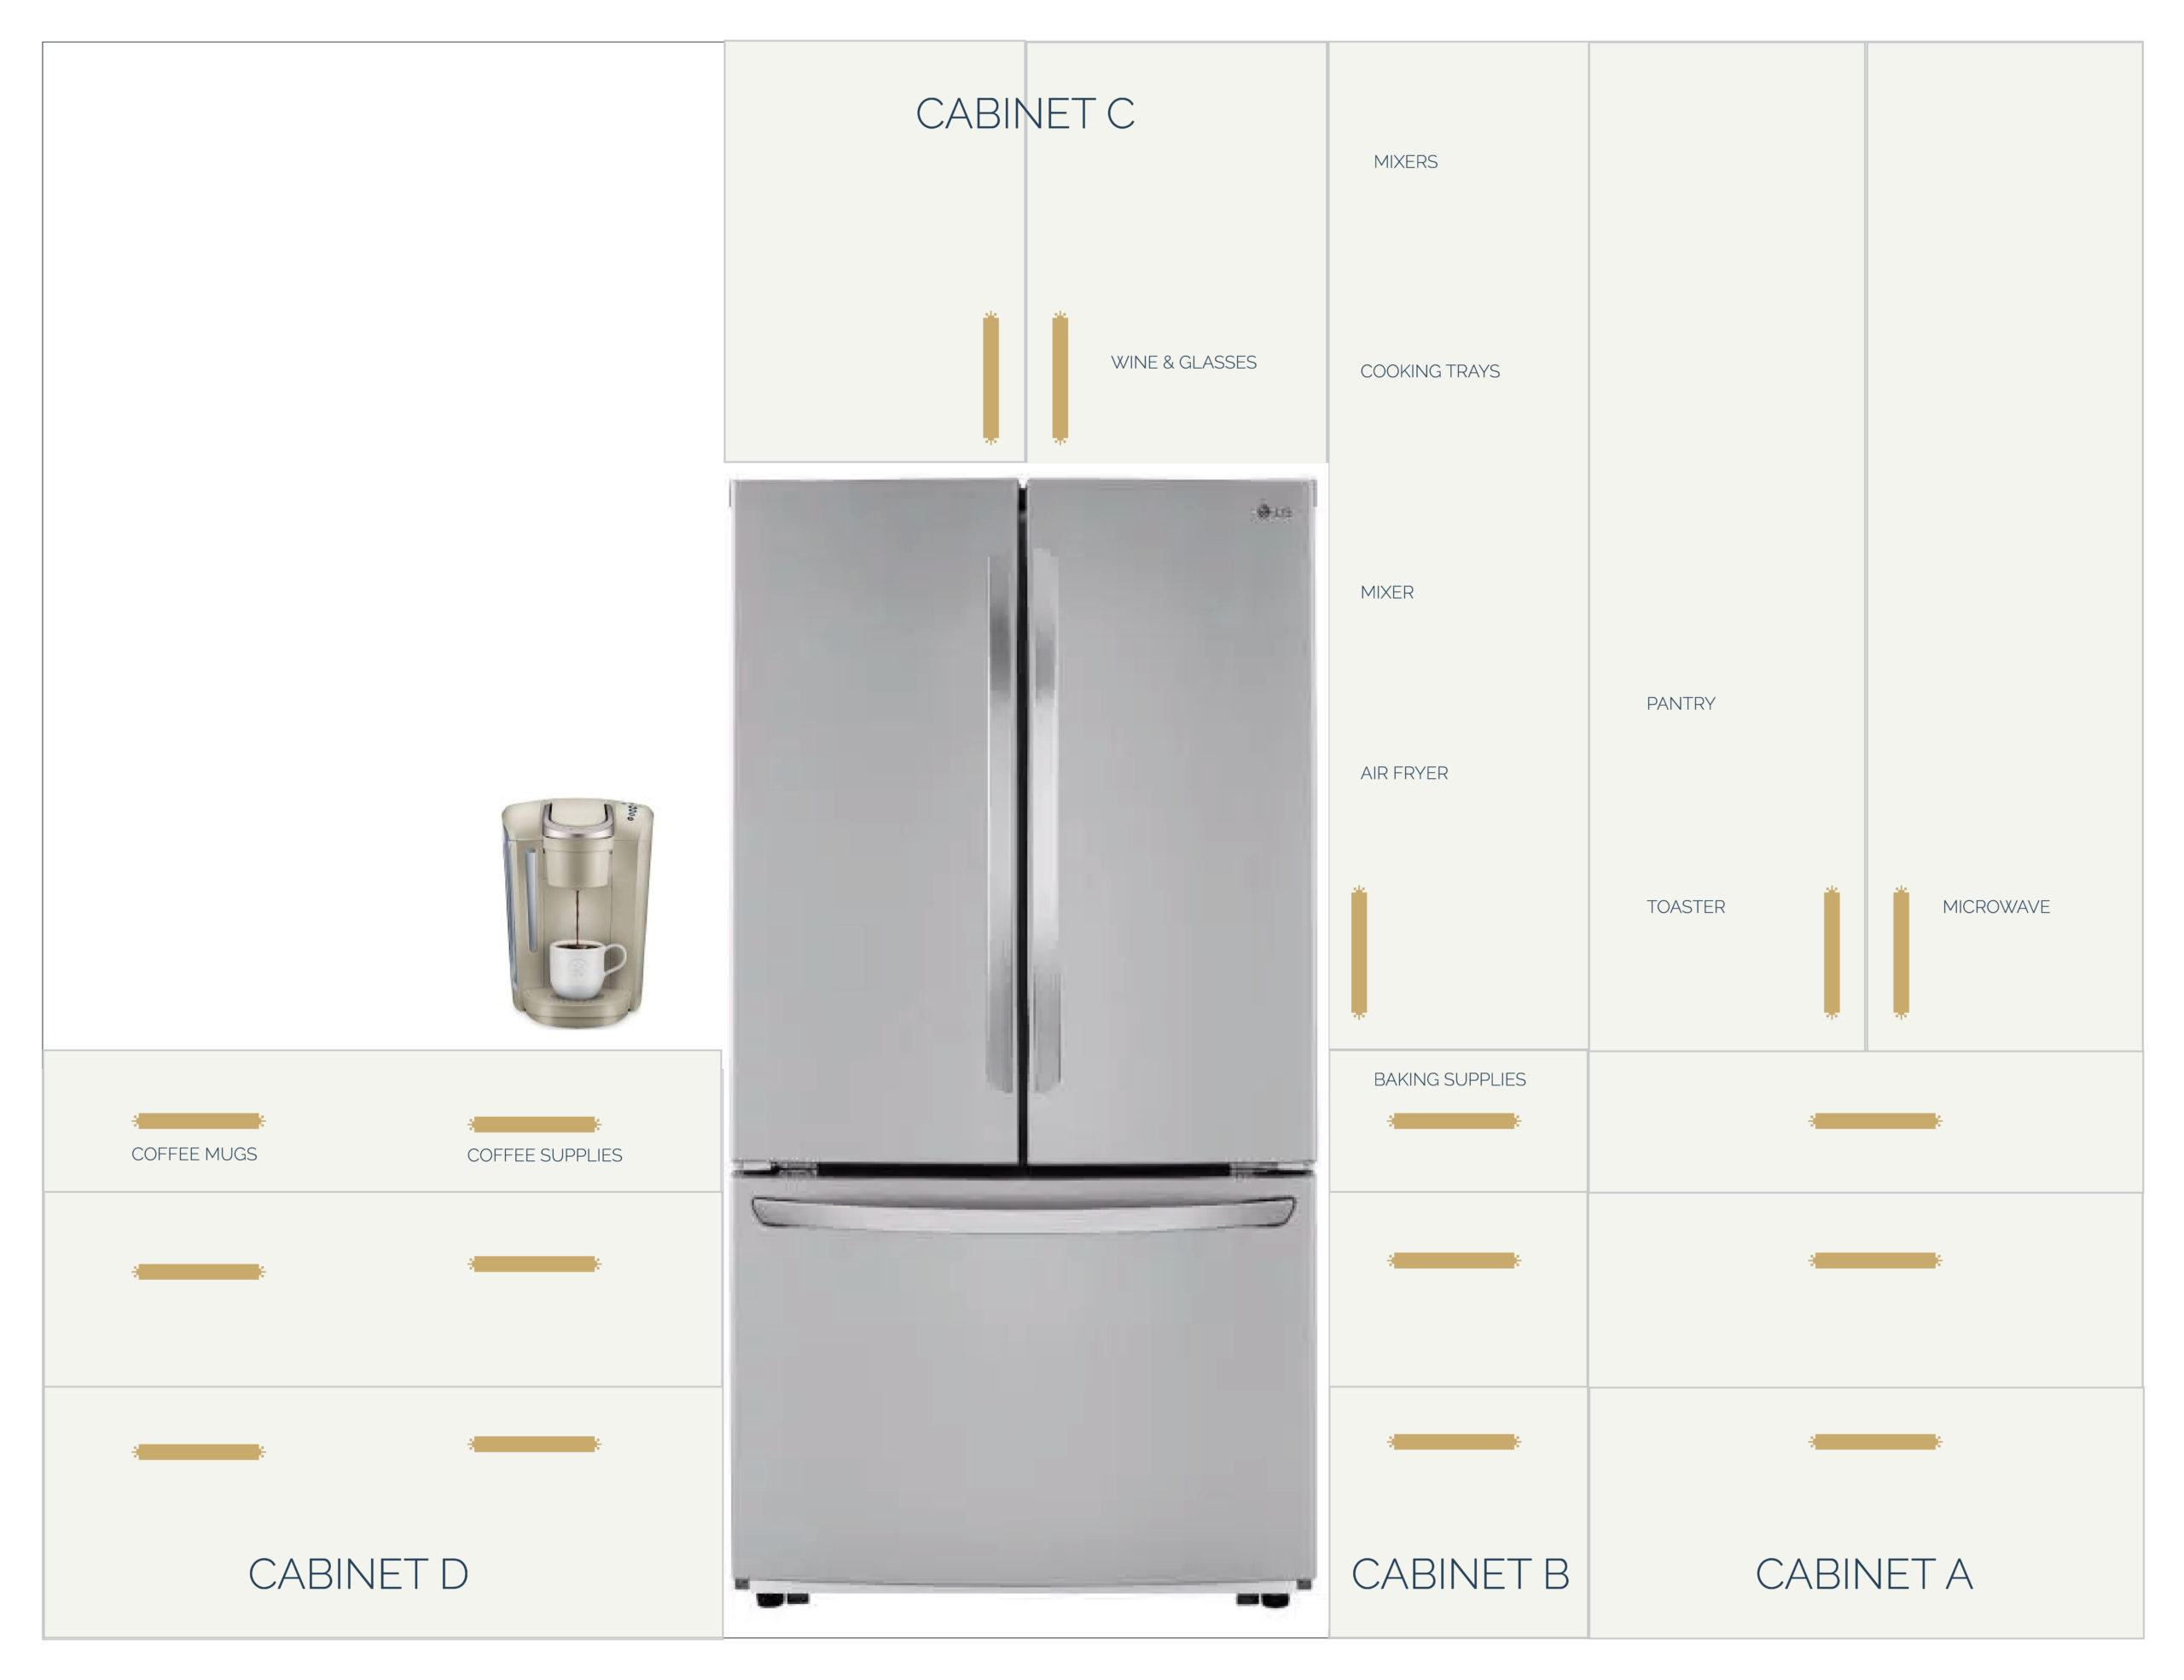
There were four cabinets involved with this project, which I named cabinets A-D, starting with the far right corner.
Cabinet A
This cabinet was designated as our pantry cabinet. It would become where all of our dried foods would go, while also housing our Microwave and Toaster.

Cabinet B
Cabinet B is much thinner but has a little more depth. This cabinet is designated as our appliance garage, small kitchen tool storage, and baking supply storage

Cabinet C
This is a simple over-the-fridge cabinet. It houses things like wine glasses and other items that are not frequently used. Honestly, the main purpose is to enclose the fridge and create a continuous look!

Cabinet D
I decided to do just a lower cabinet on this side to create a little more openness when you come into the kitchen from the hallway. I thought doing ceiling height here would make it look a little too tight. So, this is basically our coffee station that includes some additional lesser-used items in the drawers.

What now?
Over the next few weeks, I’m going to share how I built these cabinets, starting with the cabinet boxes, to adding doors, drawers, trim, and a small countertop! Then, we’ll move on to Phase 2 where I upgraded my old, existing cabinets. And finally, Phase 3, where we do everything from flooring to new countertops, paint, lighting, etc. I’m pretty excited, are you?